Table of Contents
I’ve spent the last few weeks exploring NLWeb, Microsoft’s open-source framework for grounded conversational AI. NLWeb (short for Natural Language Web) is a framework designed to make web systems interact more naturally with human language. It focuses on bridging the gap between traditional code-based interfaces and natural language processing (like we see in models such as ChatGPT), allowing us to build applications that understand, interpret, and respond to user input in a way that feels intuitive and conversational to them.
This guide is part one of a series. Here, we’ll stand up NLWeb locally, connect it to Azure AI Search and Azure AI Foundry, and ingest a custom dog breed dataset. In part two, we’ll create a small-but-powerful NLWeb proxy using .NET 10. In part three, learn how to add new functionality and remote API calls using NLWeb’s custom tools.
What is NLWeb?
NLWeb (Natural Language Web) is an open-source framework from Microsoft that lets you build web apps that understand natural language directly – without relying on heavyweight orchestration tools. It connects models like Azure AI Foundry’s GPT-4 and embedding services to existing databases or APIs through a “grounded” architecture.
What We’ll Cover
In this post, we’ll create a local chat demo together that connects:
- NLWeb running locally
- Azure AI Search for embeddings and filters
- Azure AI Foundry for grounding and reasoning
- A custom dog breed dataset (from The Kennel Club’s A-Z list)
1. Set Up Azure AI Search & Azure AI Foundry
Let’s begin by setting up the required resources via the Azure Portal.
Azure AI Search
Log into the Azure Portal and browse the marketplace. Create a new Azure AI Search service:
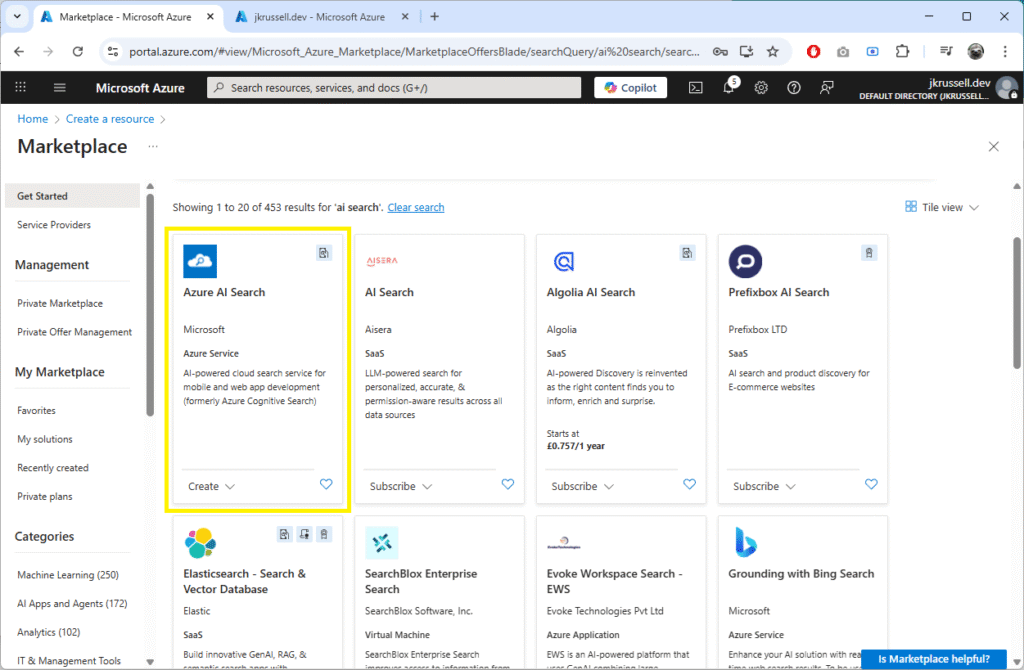
Choose a name and following the steps, using default settings. Copy the endpoint and admin key – we’ll use them as environment variables later.
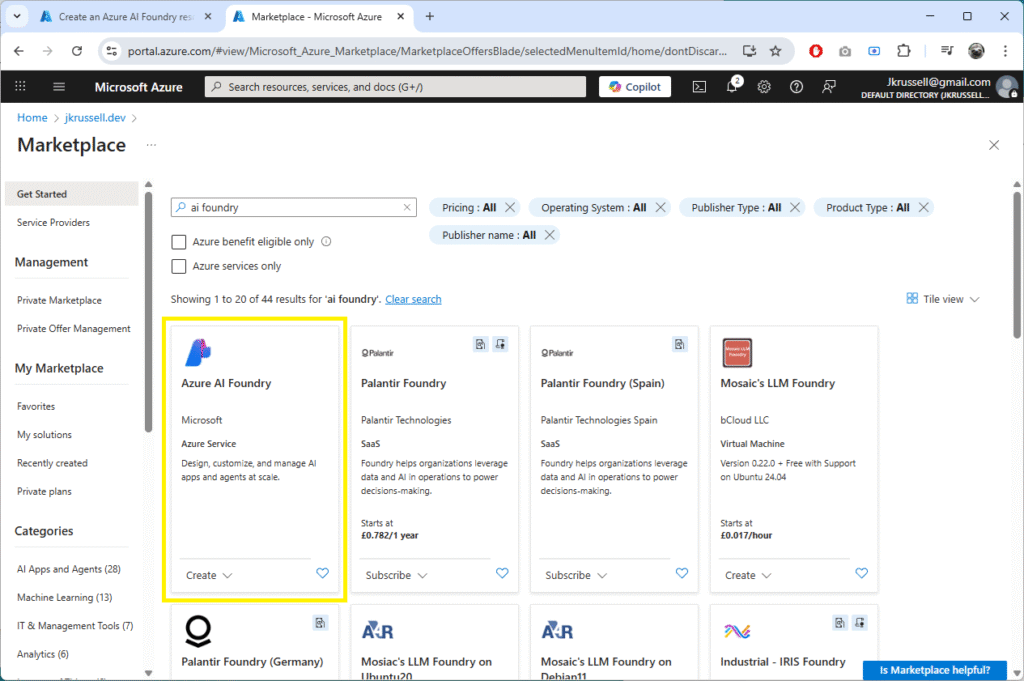
Azure AI Foundry
Open the Azure AI Foundry service and click Create:
Follow the default steps and create it in the same resource group as before. If all goes to plan, you’ll see the following resources in your resource group:

Navigate to the new Azure AI Foundry resource and click the Go to Azure AI Foundry portal to be taken to ai.azure.com. For this demo, we’ll use gpt-4.1-mini and gpt-4.1 models, which are the defaults in NLWeb and will mean we have to make fewer configuration updates.
First, browse the model catalogue and select gpt-4.1-mini:
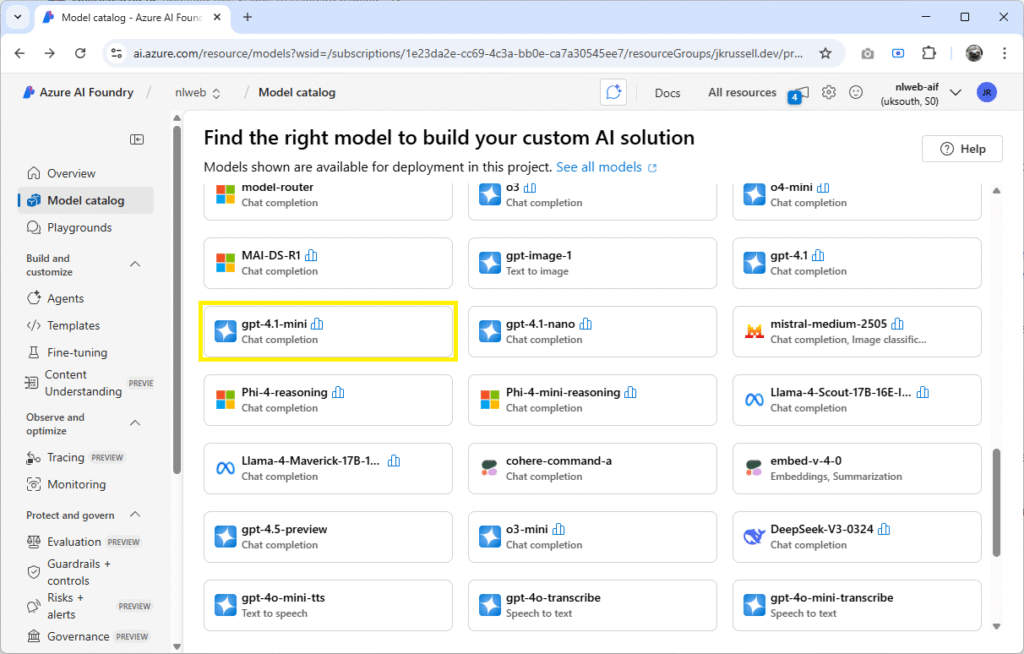
Click gpt-4.1-mini to view details and select Use this model, and Deploy:

Follow the same steps and deploy a gpt-4.1 model.
Finally, copy the endpoint and API key, which will be the same for both.
Confirm Azure AI Foundry Deployments
To check that you have the required deployments, click on the Models + endpoints link on the bottom left of the Azure AI Foundry Overview page, where you can confirm the three models are present:
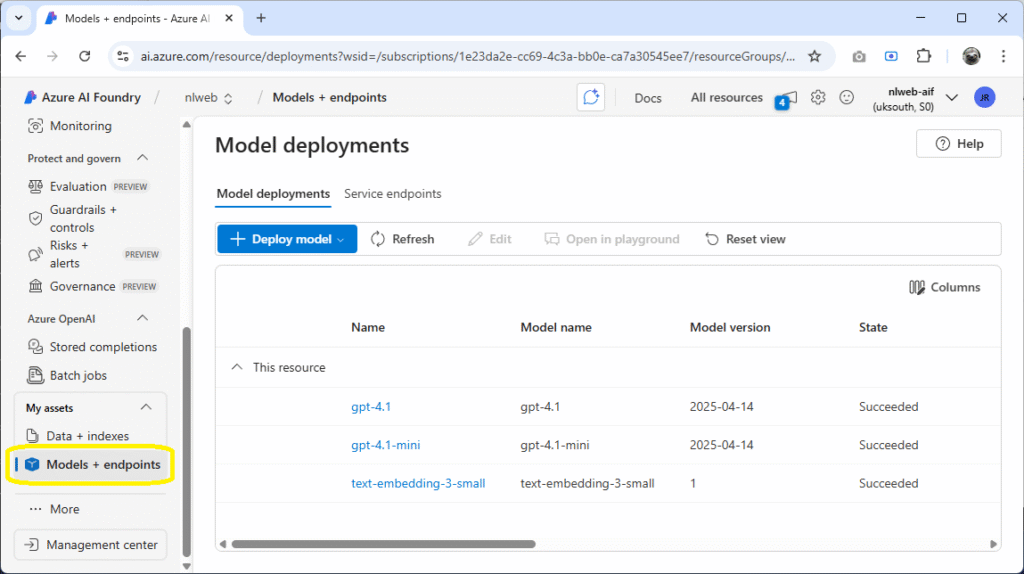
You should see a list containing gpt-4.1, gpt-4.1-mini, and text-embedding-3-small.
2. Install and Run NLWeb Locally
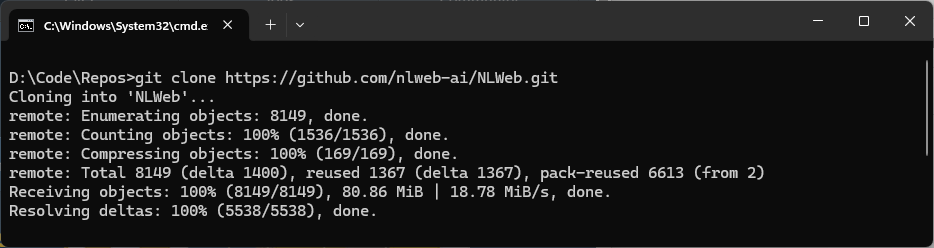
Now we’re ready to set up a dev instance of NLWeb and get it running locally. Clone the NLWeb GitHub repository either via your favourite IDE or by using the command line:
git clone https://github.com/nlweb-ai/NLWeb.git
cd NLWebYou’ll see the following output in the console, and the project will be placed in a new directory called NLWeb:
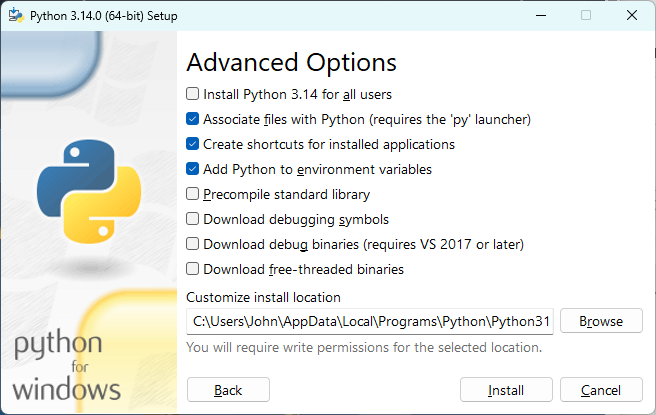
Download Python
Visit the Python project page and download the latest version. After launching the installer, tick Add Python to your environment variables so that it’s accessible globally via the command line:
If you’re using the Python install manager instead, a similar option will appear in the console.
Once installed, open a brand new console window and make sure you’re good to go by typing py or python and pressing enter. You should see the following output:

If you see “'python' is not recognised as an internal or external command“, double check that it’s been added to your PATH variable (how to).
Install NLWeb Dependencies
From the new NLWeb directory, run the following commands in turn:
# Create virtual environment
python -m venv myenv

# Activate the virtual environment
myenv\Scripts\activate

# Navigate to the Python code folder
cd code\python

# Install dependencies
pip install -r requirements.txt3. Configure NLWeb for Azure Integration
We’ll need to make some changes to the default configuration files in NLWeb to get everything up and running. Here’s what changes you need to make to files in the config directory, assuming you followed everything so far in this demo:
config_conv_store.yaml
Change the default storage endpoint from qdrant_local to azure_search:
# Default storage endpoint to use
default_storage: azure_searchconfig_embedding.yaml
Update the api_version_env to reflect the API version you are using:
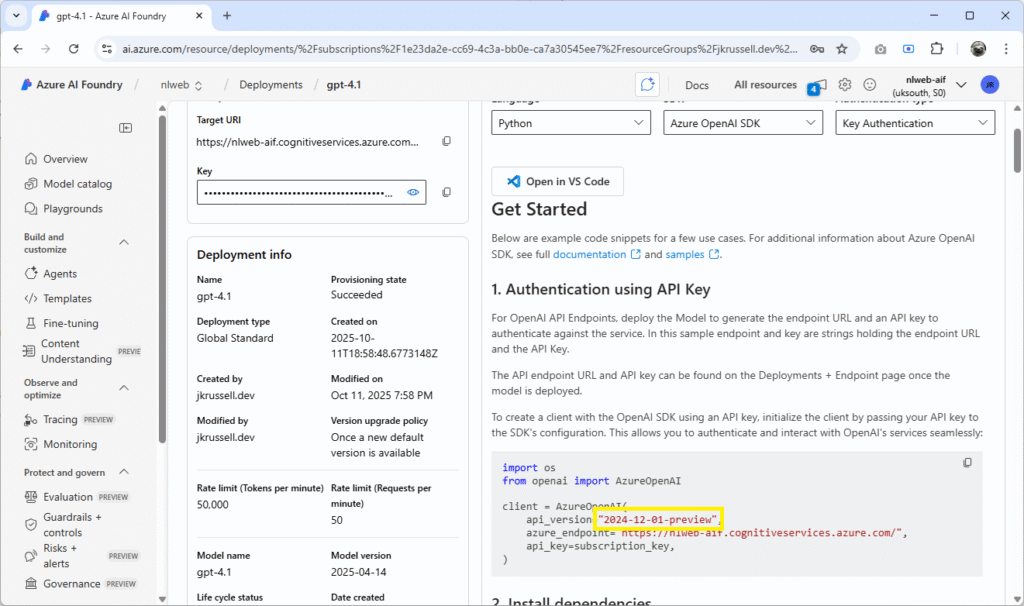
api_version_env: "2024-02-01" # Example date - replace with your specific versionYou can find the API version your models are using by viewing the details in AI Foundry. Selecting gpt-4.1, for example, shows an initial Get Started page, which reveals the version:
config_retrieval.yaml
Switch out the write_endpoint value at the top of the file from qdrant_local to azure_ai_search:
write_endpoint: azure_ai_searchThis tells NLWeb to write embeddings and metadata directly into Azure Search instead of the default local Qdrant vector database.
Next, a few lines below under the azure_ai_search heading, change the index_name to nlweb:
azure_ai_search:
  ...
index_name: nlwebLet’s also turn off some of the real time web search APIs and local storage options whilst we’re here, as we won’t use them for now:
bing_search:
  enabled: false

...

qdrant_local:
  enabled: false

...

shopify:
enabled: falseThat’s it – we’re done with config updates for this demo, though do have a trawl through and examine some of the options that can be set, as they might come in useful for your own projects.
Creating Environment File: .env
There’s one final thing to do before we get ready to run NLWeb locally, and that’s to ensure we provide it with all of the required environment variables. This is done in Python by creating a .env file. Kindly, a template has been provided with the repository, named .env.template, which contains lots of flags that can be set to configure different behaviours.
Create a new file called .env in the root NLWeb directory you pulled using git earlier. The only settings we require for our setup in the file are below:
AZURE_VECTOR_SEARCH_ENDPOINT="https://YOUR-SEARCH-SERVICE-NAME.search.windows.net"
AZURE_VECTOR_SEARCH_API_KEY="YOUR-KEY"

AZURE_OPENAI_ENDPOINT="https://YOUR-AI-FOUNDRY-NAME.cognitiveservices.azure.com/"
AZURE_OPENAI_API_KEY="YOUR-AI-FOUNDRY-KEY"

NLWEB_LOGGING_PROFILE=developmentRemember to replace both endpoint addresses and secrets with your own. These settings can be found in the Azure search service you created:
- Endpoint address is the Url field in the Overview tab.
- Key can be found by selecting Settings > Keys in the left-hand menu.
In AI Foundry, both are on the Overview page, labelled Azure AI Foundry project endpoint and API Key.
Remember, don’t ever commit or share your .env file as it contains sensitive information – always add it to .gitignore.
Check Connectivity
Once you’ve made all the required configuration updates, it’s time to ensure that connectivity to the search service is working as expected by running the following command:
# Run the check_connectivity.py script
python testing/check_connectivity.pyAt this point, an index doesn’t yet exist in the search service because we’ve not loaded any data. It’s normal to see just two out of the three connections in a successful state at this point:
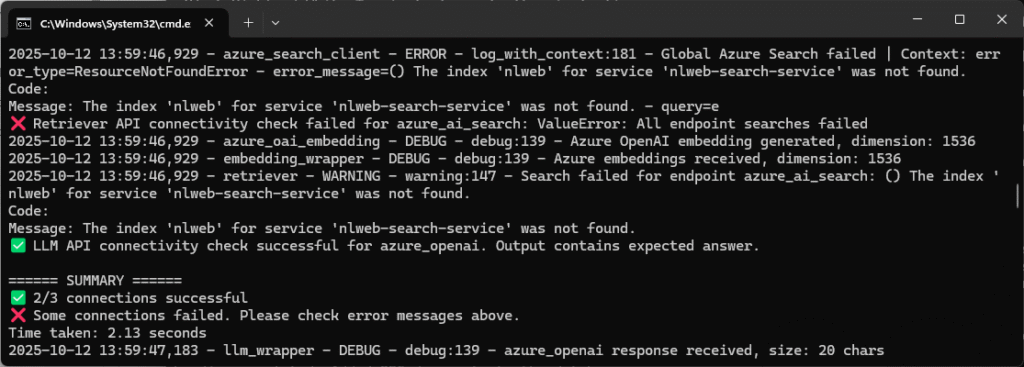
You’ll notice the message "The index 'nlweb' for service 'nlweb-search-service' was not found." Don’t worry about this failed connection for now – we’ll create the index in the next step by loading in some sample data I’ve curated.
4. Ingest and Verify the Dog Breed Dataset
There are a few ways to build indexes in the Azure search service, but for this demo we’ll keep things simple and use the packages tool data_loading.db_load that comes with NLWeb. It you look in \data\json directory of the NLWeb repo you’ll see a pre-packaged example dataset called scifi_movies_schemas.txt – I’ve used that as an example to create some structured dog breed data (in this case non-schema.org aligned) to demo how easy it is to pull in and make usable.
Building the Dataset
I’ve created a small knowledge base using factual labels (not prose) from The Kennel Club’s A-Z list. The structured JSON file describes the breed, its characteristics, and the source of the data. The data_loading.db_load tool is very particular about formatting, so I’ve made sure to follow the example’s structure to keep things simple – although, in reality, it can accept multiple data formats.
Here’s what the import file looks like in full:
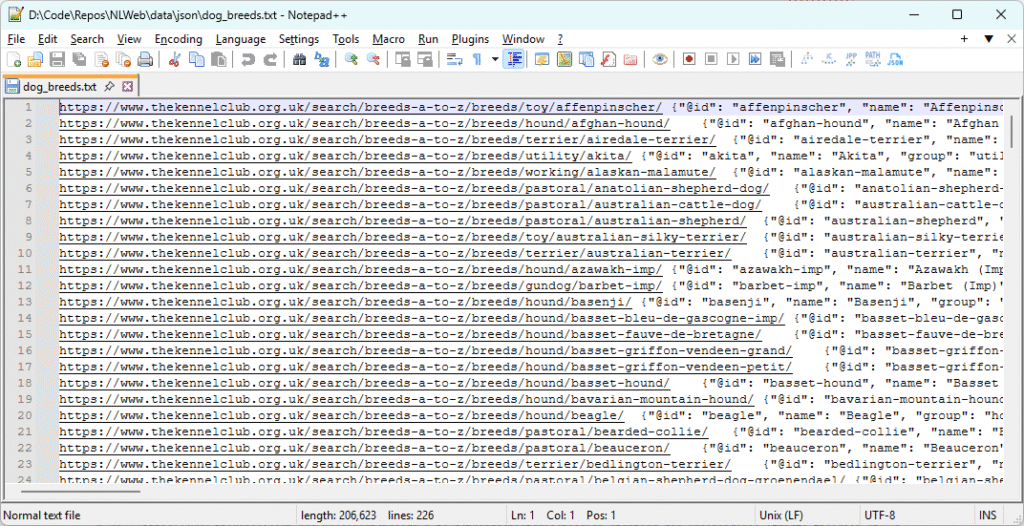
Expanding and formatting one of those lines, you can see exactly what I’ll be ingesting into the new search index:
  https://www.thekennelclub.org.uk/search/breeds-a-to-z/breeds/toy/affenpinscher/
{
	"@id": "affenpinscher",
	"name": "Affenpinscher",
	"group": "toy",
	"imageUrl": "https://www.thekennelclub.org.uk/media/1598/affenpinscher.jpg?rmode=crop&ranchor=center&width=81&height=81&v=1d8265fb5361a40",
	"imageAttribution": "Image (thumbnail) © The Kennel Club",
	"imageSource": "https://www.thekennelclub.org.uk/search/breeds-a-to-z/breeds/toy/affenpinscher/",
	"source": "https://www.thekennelclub.org.uk/search/breeds-a-to-z/",
	"characteristics": {
		"size": "small",
		"exercise_minutes_per_day": {
			"min": null,
			"max": 60
		},
		"home_size": "apartment",
		"grooming": {
			"times_per_week": 3,
			"note": "2-3x/week"
		},
		"coat_length": [
			"medium"
		],
		"sheds": true,
		"lifespan_years": {
			"min_years": 12,
			"max_years": null
		},
		"vulnerable_native_breed": false,
		"town_or_country": "either",
		"garden_size": "small_medium"
	}
}Download the file in full from this demo project’s GitHub repo: dog_breeds.txt.
Note: If you’re working with a pretty small dataset, AI can help condense your content into smaller, structured pieces like this. It’s often easier than screen-scraping the information yourself, and really handy for testing out small projects like this.
How to Ingest Data
Using default settings, the data_loading.db_load tool will create a new index (if one doesn’t already exist) using the index_name we specified in the config_retrieval.yaml file earlier:
azure_ai_search:
  enabled: true
  api_key_env: AZURE_VECTOR_SEARCH_API_KEY
  api_endpoint_env: AZURE_VECTOR_SEARCH_ENDPOINT
  index_name: nlweb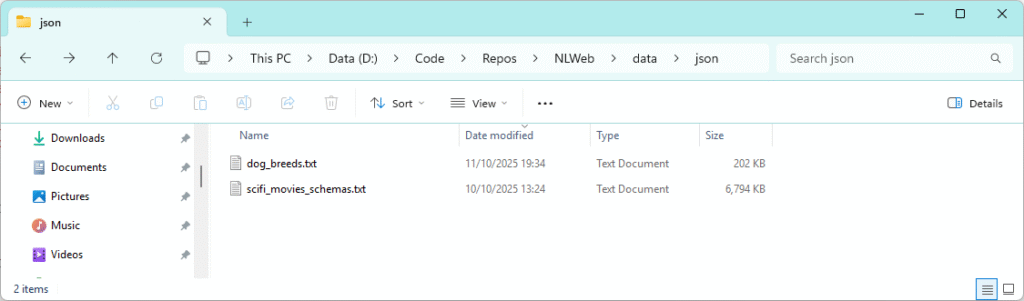
db_type: azure_ai_searchCopy the dog_breeds.txt data file to the data\json folder:
Run the following commands to ingest the data into the search service:
# Use the virtual environment
python -m venv myenv
myenv\Scripts\activate

# Change directory to code\python
cd code\python

# Load the data into the search service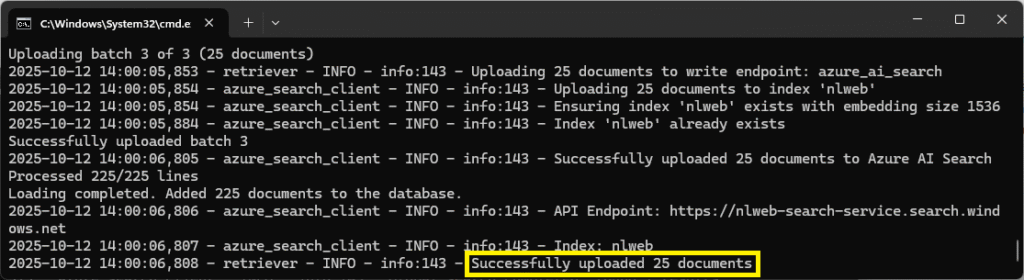
python -m data_loading.db_load ..\..\data\json\dog_breeds.txt DogBreedsOnce the script has run to completion, you’ll see a status update in the console:
Navigate to the search service and you should see statuses updated to reflect the new data:

Clicking into the nlweb index and pressing the Search button will return all of the loaded data. Note the site value that we specified in the db_load command:

Selecting the Fields tab in this view, checking the embedding as retrievable, saving and reloading the data in the Search explorer tab will allow you to see the vectors created in the embedding field:
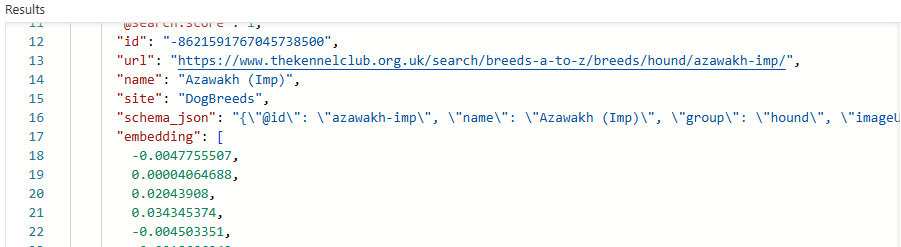
That’s where the embedding model that we deployed earlier, text-embedding-3-small, has first come into play. A small embeddings model is perfect for our single domain set of dog breed data, though more complex models exist for multi-domain datasets. I won’t cover that here, but there’s a great OpenAI article on text embeddings, if you want to read more.
Remember to mark the embedding field as non-retrievable again so that it’s not returned to the client with every request. If you leave it on, it could negatively impact performance in your searches.
Hybrid Search Explained
Azure AI Search combines BM25 keyword scoring with vector similarity to return both literal matches (“small dog apartment”) and semantic ones (“low-energy dogs for city life”). In this demo, you’ll see how embeddings add nuance beyond plain text matches.
How to Delete Data
The data_loading.db_load tool has some useful flags you can set when running, not least the one to delete specific portions of data from the search service. There are situations where you may have data in a search index that belongs to different ‘sites’ – for example, if you’ve imported any of the other sample data like Behind-The-Tech from the NLWeb GitHub Hello World doc. In that case, to delete only a specific set of imported data with a given site name, run the following command:
python -m data_loading.db_load --delete-site DogBreeds --only-deleteThe console will report “Successfully deleted 225 documents for site: DogBreeds” and leave data for other sites intact within the search index.
Re-running Connectivity Checks
Following the steps above, which created our search index, let’s re-run the connectivity checks for NLWeb. All connections should now be working, indicating that the environment is configured correctly:

5. Start NLWeb and Chat with Your Data
We have everything in place now to successfully start a local NLWeb instance and begin interacting with our data. For subsequent runs that don’t require initial installation of packages, I’ve found it useful to create a small batch file in Windows to avoid typing out commands each time I want to start the NLWeb server. Save the following to a file called startup_win.bat in the NLWeb directory and double click the file:
# Enter virtual environment
call myenv\Scripts\activate

# Navigate to the Python code folder
cd code\python

# Open Chrome on localhost (you can change this to whichever browser you prefer)
start "chrome.exe" http://localhost:8000/

# Run the app file to start the server
python app-file.pyIf all went well, you should see the following in your command prompt:
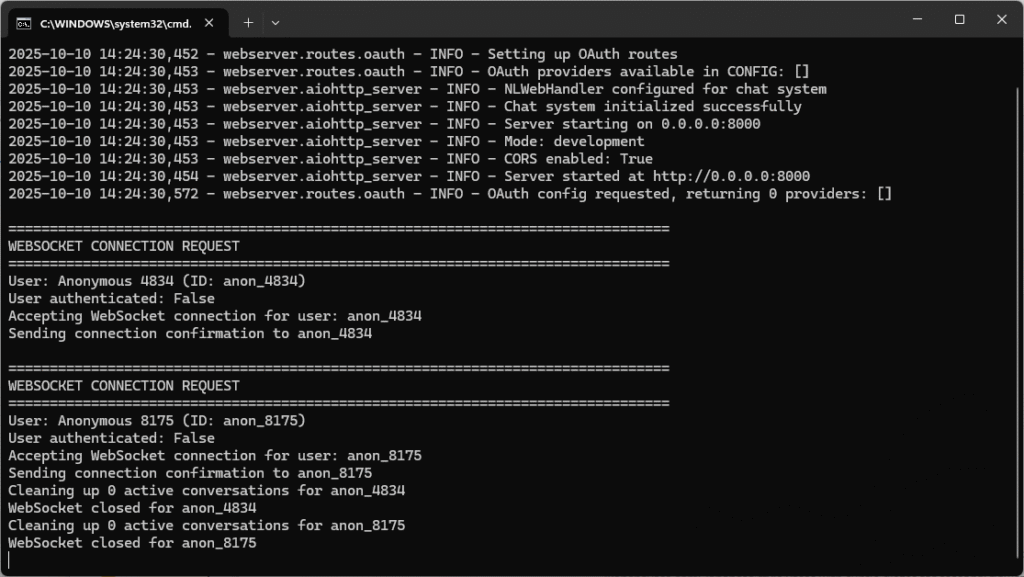
And a Chrome browser (or whichever you chose) will launch with the out-of-the-box chat interface. Below, you can see I’ve been asking some questions, trying to choose the perfect dog to my pretend couch-potato, apartment lifestyle…
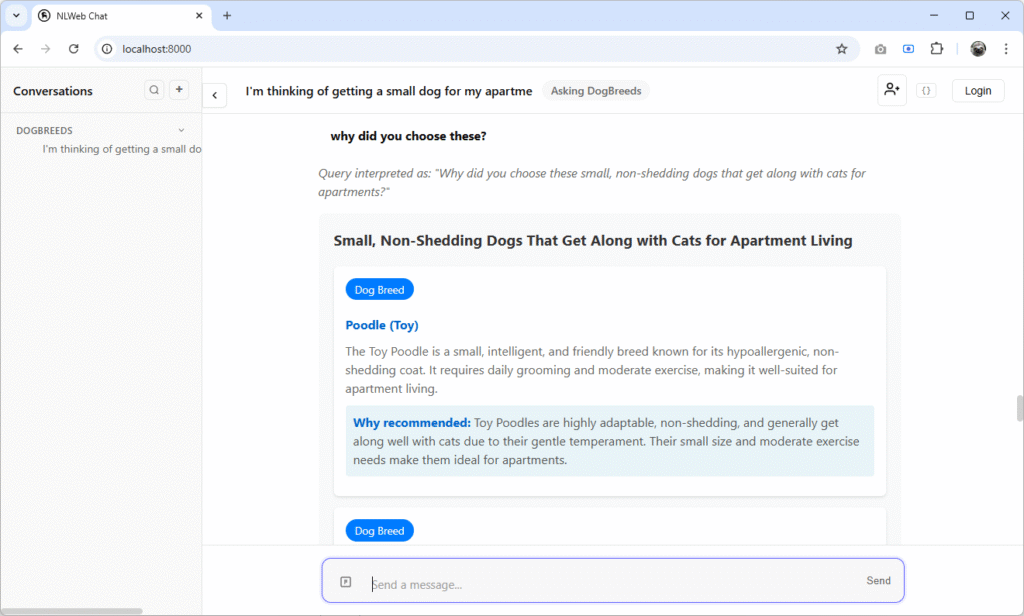
Try out some of your own queries and experience the cool features of contextualisation that NLWeb makes easy!
What’s Next
We’ve now got a fully working local instance of NLWeb connected to Azure AI Search and Azure AI Foundry – complete with a searchable dog breed knowledge base and semantic vectors. That’s a powerful foundation for any conversational web app.
In part two (coming soon), we’ll take this even further by surfacing results through a simple .NET 10 front end to show how easy it is to plug into the NLWeb API endpoints.
If you want to get ahead while you wait for part two, check out these official resources:
- NLWeb on GitHub – explore the source, examples, and roadmap.
- Azure AI Search: Vector Search Overview – a deep dive into hybrid and semantic search concepts.
- Azure AI Foundry Documentation – learn how to create, deploy, and manage GPT and embedding models.
- OpenAI Embeddings Guide – understand how text embeddings represent meaning numerically.
That’s it for now – see you next time!